Installing Debian 11 Bullseye with btrfs subvolumes
This is a small guide on how to install Debian Bullseye with separate btrfs subvolumes for root (/) and home (/home). This is by no means a comprehensive installation guide for Debian but instead is a short list of items worth considering while doing the install. Power users might want to do things differently ;).
I'll also expect you to know what you are doing since we will do many (potentially) destructive changes in this guide. It's on you if you brick your computer with this guide. That said, hope you find this guide helpful.
Starting the installation
Start the install with:
Advanced options... Expert install (or Expert graphical install)
Continue the installation normally until you get to the disk partitioning step. Once there do not continue with the default selection, but select Manual partitioning method instead.
Preliminary partitioning of the target disk
We'll install Debian on the /dev/nvme0n1 SSD which I've already emptied by selecting every partition one by one and removed by pressing [enter] and selecting Delete the partition. That gives us a nice clean disk to work on.

Once the disk is emptied select the FREE SPACE under the Intel SSD and use the Automatically partition the free space tool to let Debian build basic partition structure which we'll modify later (basically we'll leave swap and ESP partitions in their default state. Power users might want to do this differently.). Select All files in one partition scheme once the tool asks for it.
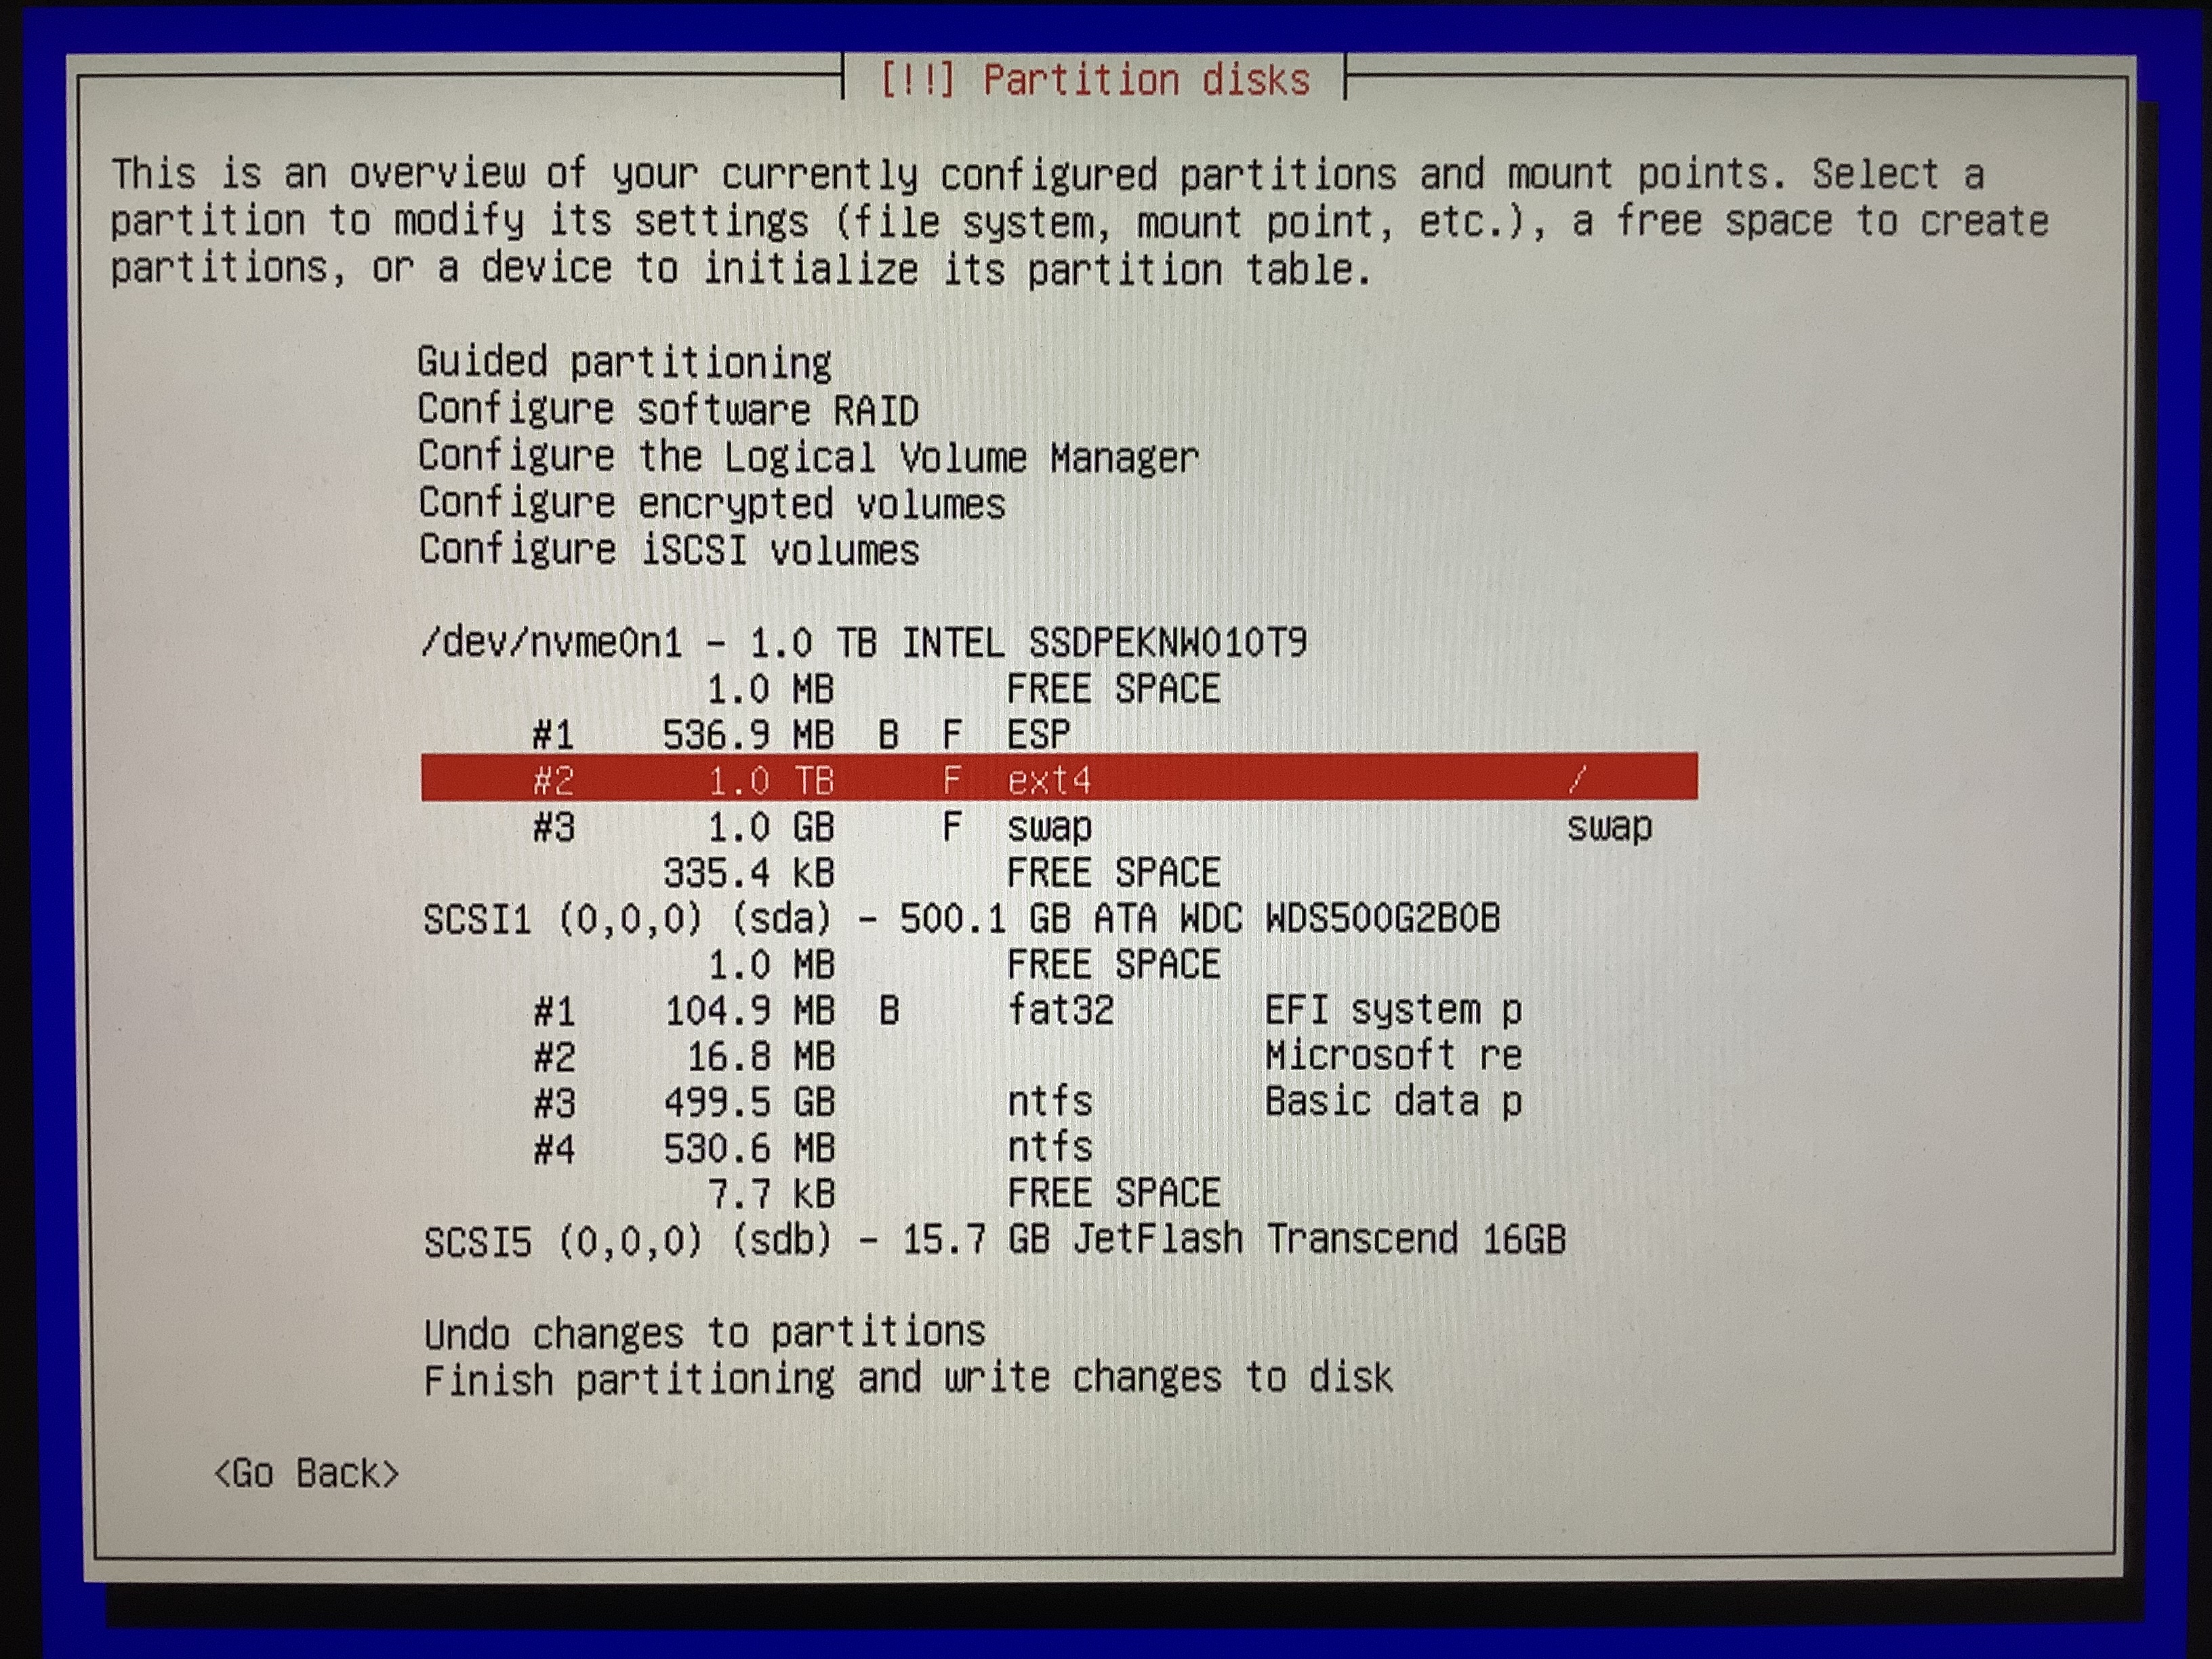
Do not finish the partitioning once the tool returns to the disks view. We still need to do some modifications to the root partition (selected in the image below).
Necessary partition modifications
Select the root partition (partition #2 in the image above) and modify it to use btrfs as file system, and opt to format the partition. Select Done setting up the partition to actually store the changes. Now we need to write the changes to disk by selecting Finish partitioning and write changes to disk.
Subvolume creation
Next we need to open the shell to do some more modifications, so select Execute a shell to start a shell. Debian has now mounted the new root partition as /target. Move into that directory with cd /target. Once there you might want to list current btrfs subvolumes with btrfs subvol list .. There should be one subvolume with path @rootfs and level 5.
Since we would like to have our root directory in a single subfolder and /home in another subfolder we should create them now with:
btrfs subvol create @
btrfs subvol create @home
The subvolume @ will be mounted on / (root) and @home to /home eventually.
Now we need to tell the system that we want the @ subvolume to be the default subvolume. That can be achieved with command btrfs subvol set-default 257 . (remember to change 257 to the ID of the subvolume @ if it differs from this example).
Moving things around
Debian installer has already inserted some directories to the @rootfs (the default btrfs volume the installer builds). We need to move those directories to the @ subvolume:
mv /target/etc /target/@
mv /target/media /target/@
Modifying fstab
Once the directories are moved we would want to edit the fstab fixing the / mount point and adding one for /home. First start the text editor with nano /target/@/etc/fstab.
First cut the line with subvol=@rootfs with ctrl+K and paste it twice with ctrl+U. From the first line change the subvol=@rootfs to subvol=@rootfs/@. From the second line change subvol=@rootfs to subvol=@rootfs/@home and change / to /home.
You might also want to add options ssd,noatime,space_cache,commit=120,compress=zstd to both of the lines. Example fstab file is seen below:
# /etc/fstab: static file system information.
#
# Use 'blkid' to print the universally unique identifier for a
# device; this may be used with UUID= as a more robust way to name devices
# that works even if disks are added and removed. See fstab(5).
#
# systemd generates mount units based on this file, see systemd.mount(5).
# Please run 'systemctl daemon-reload' after making changes here.
#
# <file system> <mount point>   <type>  <options>       <dump>  <pass>
# / was on /dev/nvme0n1p2 during installation
UUID=22f44acd-bff8-43e5-86aa-c5111cdc7282 /               btrfs   defaults,subvol=@rootfs/@,ssd,noatime,space_cache,commit=120,compress=zstd 0       0
UUID=22f44acd-bff8-43e5-86aa-c5111cdc7282 /home               btrfs   defaults,subvol=@rootfs/@home,ssd,noatime,space_cache,commit=120,compress=zstd 0       0
# /boot/efi was on /dev/nvme0n1p1 during installation
UUID=ED54-669B  /boot/efi       vfat    umask=0077      0       1
# swap was on /dev/nvme0n1p3 during installation
UUID=022f597e-4fb8-4fdc-8b11-866ffa8e46f1 none            swap    sw              0       0
Now we need to change to / directory, unmount the target and remount the @ subvolume in it's place. We would also mount the efi again, and the @home subvolume inside /target/home:
cd /
umount /target/boot/efi
umount /target
mount /dev/nvme0n1p2 /target
mkdir /target/boot
mkdir /target/boot/efi
mount /dev/nvme0n1p1 /target/boot/efi
mkdir /target/home
mount /dev/nvme0n1p2 -o subvolid=258 /target/home
Remember to change the partition /dev/nvme0n1p2 to match your btrfs partition and /dev/nvme0n1p1 to match your EFI partition. The subvolid=258 will need to match the ID of your @home subvolume.
If everything went well you should have the previously created @ subvolume mounted at /target with directories etc, boot, home and media inside (check with ls /target).
Now exit the terminal with exit and continue the installation with Install the base system.